Friday, December 16, 2011

Copy your Figure: A Dressform Tutorial part 3


Part 3 of this tutorial shows how to pad out your mannequin to fit your cover along with all the finishing details. Listed here are all three parts of this tutorial:


First off, let me say a few things about the type of mannequin that will make a successful base for this project, because not all mannequins are equally useful. Use a mannequin that has a solid shape that cannot be depressed or compressed easily. The core shape can be Styrofoam, wire, paper maché- it doesn't really matter as long as it's not larger horizontally, or out of range for you vertically (back waist length). The closer to your own measurements, the less padding and fussing you'll need. My mannequin is a Dress Rite form*. I bought it because the waist length and upper body measurements were closest to what I needed overall.

*9-14-12 update: Dress Rite no longer sells full size mannequins. They sell 1/2 scale mannequins now.  Sew True sells several kinds of mannequins, professional and "dial" type forms at a reasonable price.


Step One: Pad out with 100% Cotton Batting
You will want to begin with the area that needs the most padding. I began by wrapping midriff, waist, and hip because I knew that these areas would be several inches too small and I would need a bigger base before beginning the precision padding. To do this, I used narrow strips just wide enough to get around the shape with minimal overlap and no gaping. I wrapped in a complete circle about 3/4 times, keeping the batting as tight as I could get it. I used straight pins to keep some areas snug, (but removed them before finalizing the shape). Once the base is good and even all over, it's time for the next step:

Step Two: Precision Padding
Put the cover on the mannequin, pinning the back closed. Step back to see where the figure needs filling out. I identify an area, and start filling in using shapes, such as rectangles, triangles, circles or any odd shape that will fit the section. Begin layering in graduated sizes that will fill in the area to get the desired effect.

Padding the hip curve with graduating rectangles
Padding out the tummy area

Fill in what will become the buttocks

I begin at the shoulders and work my way down the torso, continually replacing and removing the cover to add padding and check the tautness and smoothness as I go.

Make a silhouette comparison

Keep in mind the silhouette of the figure that you are copying. How much tummy to give? Where to tapper? Are the hips rounded with a larger tummy, or is the hip area more wide and narrow with a flat tummy? Once the silhouette is correct, MEASURE the mannequin to make sure that it matches your measurements in the same places.

Step Three: Finishing Touches
Finish up the mannequin by hand stitching the back closed. To add a neck, I used bias strips and hand stitched it in place. I made an armhole cover like this one:

I basted the circle, pressed it under. Now it's ready to stitch in place.

Added a few layers of batting cut into a circle, pinned the cover over it. It's ready to stitch.


I also added soutache in black to mark the bust, waist, hip and center front of my mannequin.
One day I will add a jewel neckline to it. 

Step Four: Shrink it Up
Once it's all stitched up, spray the mannequin nice and damp with clean water. Let it dry overnight, or better yet, use a hair dryer on it. The idea is to shrink the fabric, as cotton fabric will do, so that the cover will be nice and tight as a drum.

Whew! That was a lot of work, but well worth the trouble for those of us who use a mannequin, which I do, EVERY single day. Let me know if you use this tutorial to make your own mannequin. I'd like to know that it was helpful to someone.

Tuesday, November 29, 2011

Copy your Figure: A Dressform Tutorial part 2

Part 2 of this tutorial shows how to remove the wearing ease from your cover and shaping it for an exact duplicate of  your figure.
Here is a listing of all three parts:


Step One: Prepare for the Fitting

1. Plan to do this on a day when you are feeling good and have a good sewing friend handy. This is not a job you can do alone, nor can I over emphasize its importance. Don't ask your husband to fill in when he has no idea or interest in what you are trying to accomplish. Even working quickly with someone who knows what they are doing, expect it to take 2-4 hours from start to finish.

2.Wear a good well-fitting supportive bra. In fact, buy a new bra just for this occasion. Having made custom wedding gowns for many, many years, this is the one thing that 100% of my clients had in common. You want this mannequin to be the most attractive copy of your figure that you can give it. Besides, a droopy bust is really hard to copy.

3. Wear all of the same undergarments that you normally do. If you usually wear a girdle, or other supportive/ medical needs types of undergarments, do your fitting with those on as well. It's okay to wear a full body leotard as my model did- for modesty.

Step Two: Pin it up Tight as a Drum

Pinning the back
1. Put the cover on, with seams outward, pinning closed at the side seams and back at seam lines.
2. Make a determination on how and where to take away the wearing ease to make the cover completely form fitting. If the original pattern was fitted to your figure before attempting this project, the wearing ease for width will be almost evenly distributed throughout. There should be a small amount of ease for height as well. I wish I could say to start with the width and then take out the height, but it's not quite that simple. The main thing to keep in mind is to maintain an even waistline, parallel to the floor, and keep all seams centered and vertical.  

Pinning out the ease at the princess seam
Pinning under the bust for an exact shape

cleavage darts at center front
 3. Pin out the dart space between the breasts, creating a made-for-you cleavage. You may also need to add a dart in the back near the scapula, angling into the arm hole to accommodate the curve of the back.

Pinning the front
4. Continually evaluate. Look for ripples and drag lines that need to be stretched and pinned out.


Pinning the shoulder and marking the armscye


5.. After everything is snug and firm, the last thing to do is mark the armscye and the neckline. I used 1/4" masking tape (available in the quilting section of your fabric store) because I could visually see it better, remove and reposition it if necessary.

6. Mark the back seam line on both sides with a pencil or marker and then remove the cover.

Step Three: Mark the Seam Lines
 All those pin lines now need to be marked and transferred to the pattern. Transferring the new markings to your cover pattern are optional, but what if you needed to make a new cover for your mannequin? What are the options?
- Go through this fitting process and re-pad your mannequin again. 
- Remove the cover and cut a new one from the original. 
- Use the old one no matter the condition.
I recommend it, but if you'd rather do it the quick and dirty way, go ahead and sew up the cover using the pins as your seam line guides and call it done.If you want to transfer your new seam lines to your pattern, and perfect your cover to make sure that both sides will be the same, then read on:

1. With a pencil, mark the pin lines on the cover just as you made them. Don't worry that they might be crooked or angled. I did mine like a dash, marking exactly over the pin.

Mark the corrected seam line with a colored pencil
2. To copy the new seam lines to the pattern, take the cover apart by removing the stitches. Now you have two sides, both marked, and neither are exactly the same. You'll have to evaluate both and decide which will be more accurate, or if you need to use a combination of both. Granted, this is not an easy task, nor is one right and the other wrong, but each will have its own consequences. Any education and experience you have will help you, but all the same, this is a decision that you must make.

3. Having the new markings visible, pin the pattern and cover back together. Use a tracing wheel to trace along the new seam lines, perforating the paper below.

3. Remove the cover from the pattern and remark the pattern seam lines following the perforation. I also reduced my seam allowance to 3/8" along many, but not all seam lines.


Mark the new seam lines and reduce the cut line

If you like, this is the time to mathematically check the dimensions. My darts, which were originally straight, are now changed to a curve to match the body's shape.

Straight darts are now curved

4. Press out the original cover fabric, putting like pattern parts together, and re-pin the newly adjusted pattern to it, cutting to the new adjusted size. Sew it together once again, leaving the center back open.

  Step Four: Time for a Second Fitting

1. I decided it was best to do a second fitting just to be sure that everything was perfect. This fitting went much quicker. Wear the same under clothing as last time.

There were only a few adjustments needed. 


My model didn't leave her bra on, so I ignored the bust area and made no changes there.


Again, make these changes to your pattern and cover. 
It may help you to take photos of yourself pinned into your cover, both front, back and also a side view. This could help to make a duplicate of yourself in Part 3 of this tutorial: Padding out the mannequin.

Tuesday, November 22, 2011

Copy your Figure: A Dressform Tutorial part 1

This post is a follow up to my January post about various commercial dress forms and DIY methods sewists use to try to get a decent dress form. Though it's been a while, I didn't forget my promise to write a tutorial to make THE BEST mannequin that really does duplicate your figure. In my defense, I just finished mine in September, (though I admit I've been using it anyway, pins and all) so thank you for your patience. To keep this tutorial from growing into an unmanageable mess, I'm going to break it down into smaller parts.


The key to success is in the accurate making and fitting of a french lining or Moulage, which is a sloper, master pattern, or fitting shell  that has all of the wearing ease removed. Because this lining will become the cover of your mannequin, from here on out, I'm going to just call it a cover. 

Supplies you will need:


~ A fitting shell pattern of your choice
~ Quality 100% cotton muslin yardage- the best you can afford. DO NOT PRESHRINK! 2 yards will be plenty.
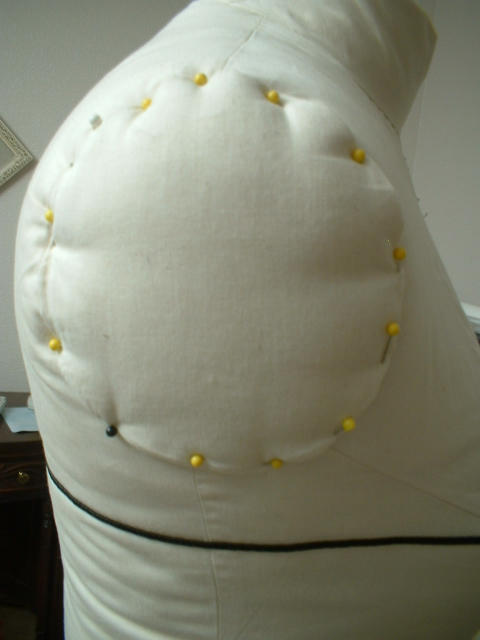
~ A sturdy mannequin- smaller than your own figure measurements
~ measuring tape
~ clean spray bottle
~ 100% cotton batting
~ various rulers both curved and grid- C-thru
~ soutache braid
~ thread
~ pencil
~ scissors
~ disappearing fabric marker
~ dressmakers carbon- I prefer the waxed type
~ tracing wheel
~ dressmakers pins
~ hand sewing needles
~ sewing machine
~ Paper for copying your pattern- Use tracing paper on a roll, usually 12-24" wide found in the art section of your craft store(If you need wider paper, tape two sections together with transparent tape). While you could skip over the copying of your pattern, remember that a final pattern of your cover will come in handy if you ever need to make a new cover for your mannequin without going through the fitting process again.

Step One: Prepare the Pattern

1. Start with a Master Pattern that you like
The only pattern pieces you will be needing are the bodice and the skirt, both front and back. Be aware that I am not endorsing ANY of these patterns. I list them only as possible sources.
Comercial Pattern Sources:
Butterick 6092
Vogue 1004
Specialty Sources:  
http://pattern.stringcodes.com/main_basic.html
http://www.surefitdesigns.com/

From BurdaStyle:
Free Download:
http://www.burdastyle.com/blog/basic-sloper-patterns-priceless
OR http://www.burdastyle.com/patterns/basic-one-piece-dress-sloper (It can be both an advantage and disadvantage to be without the waist seam- I prefer to have a waist seam to fit to).
Draft Your Own:
http://www.burdastyle.com/techniques/constructing-the-basic-bodice-block

http://www.burdastyle.com/techniques/drafting-the-basic-skirt
.
2. From Bodice with darts to Bodice with princess seams: FRONT.
If you are using a princess seam pattern then skip this section on dart mannipulation. It's also important to mention that you should ALWAYS use a ruler to trace. If you do this freehand, your work will not be so accurate.

If your pattern does not have a seam line marked, use a ruler to mark this line on your pattern. Carefully trace off your pattern pieces, tracing only along the seam line.  This is the important line to know, and at this point, we don't care where the cut line is. If your bodice has two darts, manipulate the side dart to the shoulder to make it a princess seam.

Here is a good video on You Tube that shows how to do that:
http://www.youtube.com/watch?v=pwTv7bBN7XE .

Use a ruler to connect the two darts from the shoulder to the waist. My pattern has only one dart at the waist, so I used a curved ruler to mark an attractive princess line to the shoulder.

Now we need to actually divide the bodice into two pieces by tracing off the two sides:  Start at the neckline, down the center front, squaring off at the waist, up the inside leg of the waist dart to the shoulder, across the shoulder and neck to the center front.  Add a grain line parallel to center front, label your pattern and add a notch or two if you desire. Do the same to the side front, carefully tracing around the outside leg (farthest from center front) of the darts, shoulder, waist and side seam. Add notches (if any) in identical locations to match up with front pattern, grain line parallel to center front and label. Now add a 1" seam allowance around both pattern pieces, transferring the notches to the cut line.

3. From Bodice with darts to Bodice with princess seams: BACK
On the back bodice, draw a slightly curved line from the shoulder dart to the waist dart. This line will be come your princess seam line. Copy off the Center Back and Side Back pattern pieces the same as the front, adding a grain line parallel to the center back, labeling, notches if desired, and 1" seam allowances.

4. Give your skirt pattern princess seams too!
Measuring from the waistline down center front and back, perpendicular to the grain line, shorten the skirt pieces to about 16-17". Be sure to "walk" the pattern side seams to make sure the front and back are shortened the same amount.

Draw a line from the inside dart tip to the hem. Make this line perpendicular to the center front and back. This is your princess seam sewing line. If your pattern has a second dart, you can leave it as is, allowing one more fitting element, or combine it by transfering that dart space to the dart closest to the center front. Trace off your skirt pattern pieces as before, adding  a 1" seam allowance and  labeling them skirt front, skirt side front, skirt back, and skirt side back.

Step Two: Layout , Cut, and Sew

1. Layout
Lay out your pattern as you normally would with the pattern grain line parallel to the selvage. Cut 2 of each pattern piece.  I pin on the inside of my seam line rather than on the edges, and because I want my seams to be ultra-accurate, I use dressmakers carbon and a tracing wheel to mark the seam line.


2. Pin along seam lines. Sew it up with a basting stitch. Press lightly or not at all. 
Carefully match the seam lines using a pin in the mark on both front and back to hold the seam together. 


The sewing order:

First, sew the bodice and skirt together matching bodice front to skirt front, bodice side front to skirt side front and so forth, sewing at the waistline.

Second, sew the princess seams, matching fronts to side fronts and backs to side backs, matching any notches and waist seams.


Third, sew shoulders and center front. I left my side seams open because that is where the much of the fitting adjustments will be needed, and the back so that the model can get it on.


Here is my pre-padding mannequin wearing the cover I just made with the side seams pinned together. The cover still has the wearing ease, but you can see that the mannequin is smaller, especially in the hip area. The princess lines are also in the right location, centering over the shoulder and bust points.

Thursday, October 6, 2011

ASG Conference Adventures 2011


In August, Tricia and I loaded up the car with all our vendor materials, products, and gear to travel the 2 days it takes to get to Los Angeles for the American Sewing Guild Conference, which was August 18-21. In planning the trip, I had family we could stay with, along the way and also 20 miles from downtown LA. We debated about taking a GPS with us, but decided against it. We had cell phones, Google maps printed, and family to advise us. Tricia warned me that she 1)didn't drive fast 2)needed to stop frequently and 3)had to eat meals with regularity. With 4 days of travel and 4 days of conference, it meant a lot of together time...Tricia and I thought: the two of us would either hate each other or become great friends after it's all done!

The first day was fantastic, stopping along the way to stretch, eat, and share in the driving. The California border patrol let me keep my tangerines. He'd been at his job for a long time, and could tell that mine were Californian. I was bringing them back home and tomorrow's lunch was spared.

We got into our first destination fairly late, but my brother and his wife were ready with a wonderful salad and pasta dinner. Our main question was about traffic. He suggested that tomorrow traffic would be light at 9-10am, but in the LA area, he said that he'd never known a good time to travel. The next day, and for every day after, we found that no truer words had been spoken.

Sadly, with both Google AND Mapquest maps AND cell phones, we were still not sufficiently prepared for the traffic and tangle of roads that lay ahead of us (though if you have to choose one, pick Google!). Because traffic was at a crawl coming in, we decided at the last minute to take a detour into downtown to find out how to get to our conference hotel, the Westin Bonaventure. We eventually got there, but for the next several days couldn't seem to find our way to the hotel the same way twice.

Tricia became the Official Driver in LA, and did a very fine job of it. I remained in the "navigator" seat because there was always something I had to do/prepare for on the way to the conference. She did all the errands too. She'd get to the booth and say "I took risks with your car today!" That's good to know.

Many times she had to find the parking garage on her own also. It helps to take scrupulous notes: elevator 1, level 4, row E. After one long day, I thought I couldn't walk one more step. We got to the space where our car should be, but it wasn't there. In LA, a stolen car is not an unlikely event, but I was too tired to care. I sat down on the curb while Tricia and the parking attendant raced madly up and down, back and forth trying to find the car. Then in my slumber the thought came to me - use the lock button on the fob! The car made a faint beep. Hey, everyone! Listen! Beep again. We followed the sound up-up-up until at last we found it! There is was, level 4, row E. How can that be? It appears that level 4 is more than one level and row E is more than just one row! Well why didn't I think of that!

With Tricia at the wheel every day, she was quickly reverting back to the driving skills she'd acquired while living in Florida, dodging cars and quick lane changes. What was happening to the girl who didn't drive fast?? She proved equal to the task. She soon knew her way around well enough to ask Google for alternate routes to our destination because one day we almost didn't make it to the show on time. 2 hours to drive 20 miles? I wondered, wouldn't that be the same speed as taking a horse and buggy?

Leaving the conference was equally adventurous. Getting onto the freeway was tedious, but most especially on Friday night. It looked like the whole world was lined up in 4 lanes for miles on end to get to Hollywood. What could be so exciting in Hollywood that people would be willing to drive 5 mph on the freeway to get there?? Thankfully, we were headed away from Hollywood and managed to make a quick exit. That was the first time we made good speed along I-5. I think all the cars that would have been crowding us were now desperately heading for Hollywood!

The conference was a lot of fun for us. The first night everyone is anxious to find new products and see who the new vendors are. There was quite a ruckus at our booth. There were comments like "Why haven't I seen you before?" "Will you be at Puyallup?" "I've read about you in ....magazine!" "Will you come talk to our ASG group?" "Your patterns should be in.....store." "That looks like something from I love Lucy!" in talking about the Phantom pattern. It was the number one best selling pattern.

I made a few friends and professional connection too. I put my dress, Epiphany, in the fashion show, which I myself could not wear. ASG producers asked a wonderful woman, Claire Kopp to model for me. We met later the next day and I found out that she is a developmental psychologist (phd) who just recently decided to take up sewing again after many years without it. I talked with Tami Bayer of the "Fisk-a-teers," a sewing group sponsored by Fiskars, the Scissor manufacturer. They've invited me to do a podcast in Jan or Feb of next year. I met Anne St. Clair, (that's my maiden name and we wondered a moment if we could be related?) the owner of Needle Nook Fabrics in Wichita, KS, who will now be using my Learn to Sew pattern series to teach sewing. We made good friends with Gene Barker, our "next door" vendor neighbor. He was fascinating to talk to, having an interest in and experience with historic clothing, theater, and sewing. He had set up a static display to share his antique corset and girdle collection with all of us. Unlike at the museum, we could touch!

After the conference, we spent one last day at the Huntington Museum. There we could enjoy the "Blue Boy" and "Pinkie" in full size, and contemplate our exit from that maze of hustle and bustle. We decided to make the ultimate sacrifice: sleep. We would get up at 4am and be in the car by 5. You know what we discovered? Not only were Tricia and I the best of friends (we shared many a good laugh over all this adventure!), this IS the best time to travel through LA!

Do you know of an event that you'd like to see us attend? Please send us a message!

Thursday, July 28, 2011

Time for a giveaway!


This fabulous pattern is free for the taking, and here's how:

How to enter (mandatory):

Leave a comment about this pattern on our "contact us" form at
http://www.sewchicpatterns.com/contact.html
to earn one entry.

If you'd like more chances to win:

1. Blog about this giveaway with a link back to Sew Chic Patterns
and leave the URL to your blog post in the comment to earn 5 more
entries.

2. "Like" Sew Chic on Facebook - OR - Write about this giveaway on your facebook page with a link back to Sew Chic . Make a comment at Sew Chic Facebook to earn 1 or 2 more entries.

The deadline is midnight August 6th. The winner will be chosen by
random drawing with the winner being announced publicly on Monday, Aug
8 on Facebook.

Good luck, and keep on sewing!

UPDATE: Congratulations to Cynthia Neal!

Saturday, May 21, 2011

Draping 101: how to add ruching to any basic pattern

Add some pizazz to any basic pattern by adding rows of gathering into the seam allowance with a little bit of draping. If you've never done draping before, this is a great way to get started with it.

For my example, I'm using white tricot over satin on a princess seam pattern. Because tricot is a knit fabric, I can drape this with the grain. If you are using a woven fabric, you should drape on the bias. You will need a mannequin to get the right tension and effect on the overlay.

Step 1: Sew the princess seam, or darts of your base layer. Pin it to your mannequin. Cut a rectangle, on grain, a little bit wider than and twice as long as your base.

Step 2: Using a contrast thread, hand baste a thread the length of your rectangle, on grain. I basted mine exactly down the middle. This thread will help you to stay on grain as you gather up the fabric.

Step 3: Starting at the top, pin the overlay, gathering up the fabric as you go, along the seam allowance on both sides.
Keep the gathers parallel to the floor. You should have to pull a bit horizontally to keep the gathers taut. Do re-pin and adjust the gathers until you are satisfied with the result.
Step 4: Trim the excess to match the cut line of your base.

To make it easy to sew it the same way you pinned it, use a contrast thread to tailor tack the overlay where the base has notches.
If there are long spaces without notches, add tacks to both the base and the overlay. It's really helpful to have points where you know the two match up.


Step 5: Remove the overlay from the mannequin and use it to cut a second
side. If you will be making this style again, you can make a pattern from the overlay by tracing it.


The center basting now becomes a guide for the grain line, and the tacks show where notches should go.


Step 6: Baste two rows of stitches on all gathered sides. Pin overlays on to the base matching the notches and tailor tacks. Sew overlays on top of the base pieces with a long machine stitch. Press.

Your pattern pieces are now ready to be assembled. Happy Gathering!

Tuesday, May 10, 2011

Make Mine Sheer!


Personally, I don't care for traditional suit jackets, but I can go for other types of creative layering! The concept behind #1106 began a year ago with the idea of a sheer "jacket" that can double as a shirt. Once it was near the end of the production process, I brought the package cover to exercise class to get the opinion of my friends. The first thing they said is "I don't work with THAT kind of fabric!" Ouch.

Just because you can see through it, don't automatically think the fabric need be "difficult to work with". The two most common sheer fabrics are Organza and Chiffon. Sheers get a bad reputation from Chiffons, which are slinky, slippery, with a soft hand and drape. Organza is the polar opposite, being firmer, easy to cut, and full of good body. In fact, organza is often used in finer apparel as an interfacing, and if used alone, as with the Phantom Jacket, needs no additional stiffening at all for a good shape in your collars and cuffs.

Being woven, both types of fabric will fray, yet they both can take very different types of seam finishes. The most common seam associated with sheers is called a "french seam" in which the seam is sewn in such a way that the cut edge is actually enclosed. There are so very many tutorials on french seams that I won't go into it here, except to say that the best, most professional french seams will be very narrow, less than 1/4" wide. On first glance, the seam will nearly be undetectable. With Chiffon, french seams are nearly the only option. However, with organza a french seam is a nice choice, but not the only one. Other seam finishes - from a simple serged edge, to a hong kong finish - could also be considered.

On the Phantom Jacket, the only seams needing a seam finish will be the back, side, and sleeve seam. Everything else is trimmed and enclosed in a facing. Myself, I used a serger on these seams, cutting them to a narrow 1/4". Now how easy is that? I hope my friends in excercise class might reconsider their opinion on sheers. Not all of them are "difficult"!

The Phantom Jacket and Pant pattern is available this week on Etsy on a "pre-order" status, to be mailed out on Monday, May 16th. Also, I'm offering a 15% discount on all Etsy orders now through May 16. Use the coupon code MOMSR4EVER at checkout:
http://www.etsy.com/listing/73756255/new-sewing-pattern-1950s-retro-jacket

Wednesday, April 27, 2011

Make your own Tulip Sleeve Tutorial

It must be wedding season again. My aunt called me up a week ago saying she was going to make a bridesmaid dress for a woman she does not know, and would not meet until the day of the wedding. She could not get a pattern in the same style as the other maids would have, and her challenge was to modify a pattern to make it look similar, as well as make it fit. The one thing she said she wasn't going to do was to try to make it a tulip sleeve like all the other girls would have. Over the phone, I could hardly argue the point, but I wanted to. Creating a tulip sleeve pattern would have been one of the easier tasks. In the end, the sleeve ended up being much too tight, and a gusset had to be added at the last minute to give her arm some space to move. Next time, I can direct her to this handy tutorial. No more tight sleeves please!

Tulip sleeves are an attractive and easy detail to add to any pattern with a set in sleeve. They are also very forgiving and comfortable to wear. To follow along with this tutorial, here is what you'll need:

- 2 pieces of wax paper (any paper that is transparent will work) sufficient for sleeve width and projected length.
- a medium tip Sharpie or Permanent Marker.
- Rulers to make straight and curved lines.
- transparent tape- removable photo tape works best. I use push pins with a foam core board.

1. Start with a sleeve pattern that you like the shape of. It can be long or short, gathered or tapered or whatever. I'm using a plain cap sleeve pattern. Lay your pattern flat on a table. Press if necessary. Measure about 4" from the center of the cap (there should be a symbol or a notch to show the center) on both sides, and mark that location with a dot on the original pattern. My example already had symbols marked for me. I like easy.

2. Cover the pattern with one sheet of paper. Tape it down or tack in place so it does not slide, as you'll be tracing the original pattern off. First one side, then the other.

3. Beginning at the underarm seam, trace around the sleeve, over the cap, stopping at the location of the dot you made.
Using a curved ruler, draw an attractive curve from the dot to the underarm seam. Remember that this line is your cut line. The seam line is actually inside this line, the same distance as your pattern designates (5/8"/1 cm).

4. Mark the grain line following the same grain as the original. Remember to also copy any notches and symbols.

5. Label your pattern piece, giving it a tulip sleeve "back" or "front" designation. Be sure to include the original pattern number, number to cut, and size. Because of the curve, tulip sleeves will need a lining or facing fabric to have a nice hem finish. Include a label that says "cut 2 of lining."

6. Lay the second paper over the first two patterns, and trace off the other side in the same order.

Here's what the finished pattern pieces should look like:

To assemble the sleeve, sew fashion fabric, right sides together at the underarm seam first. Do the same with the lining. With the sleeve flat, facing up, lay the lining on top, with right sides together. It is very easy to get the sides mixed up because they look the same except for the notches. Add a piece of masking tape to the wrong side and mark each side if you think this might happen to you. Pin the lining to the sleeve along the bottom edge. Beginning at the top of the front cap, sew aroun the bottom, under the arm, up to the top of the back cap. Trim, press, and understitch on the lining side. Press again, having the lining and sleeve together. Now you are ready to overlap the two sides, matching the center symbol/and or notches. Pin the overlap and baste all the way around the sleeve, just to hold the layers together. Baste again from notch to notch as you normally would. The sleeve is now ready to put into your garment. It doesn't matter if the overlap is toward the front or the back. Just choose your favorite direction and be sure to do BOTH sleeves the same way!